
Photo Tour of a Tent Campsite at Disney’s Fort Wilderness Resort
By Dave Shute
(For the first page of this review of Disney’s Fort Wilderness Resort, click here.)
PHOTO TOUR OF A TENT CAMPSITE AT FORT WILDERNESS
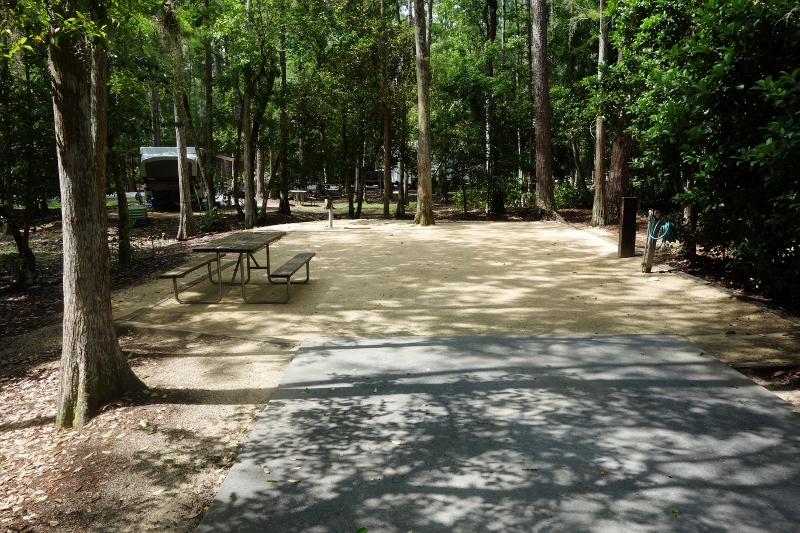
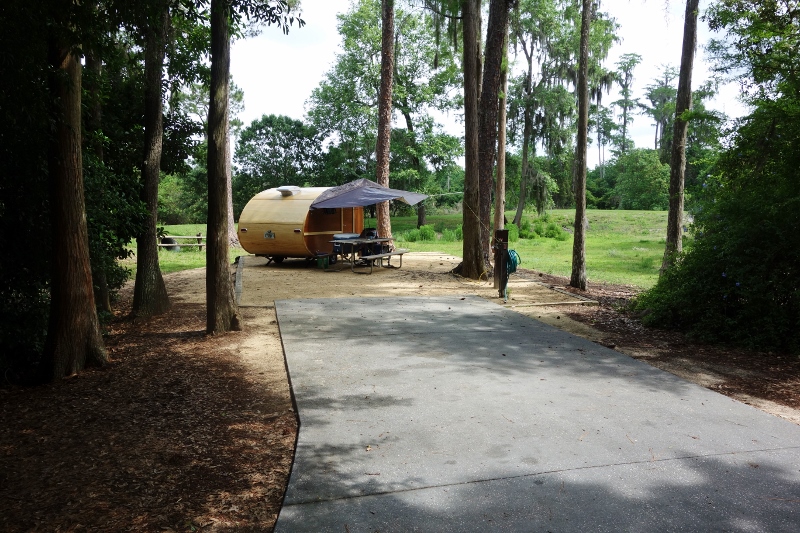
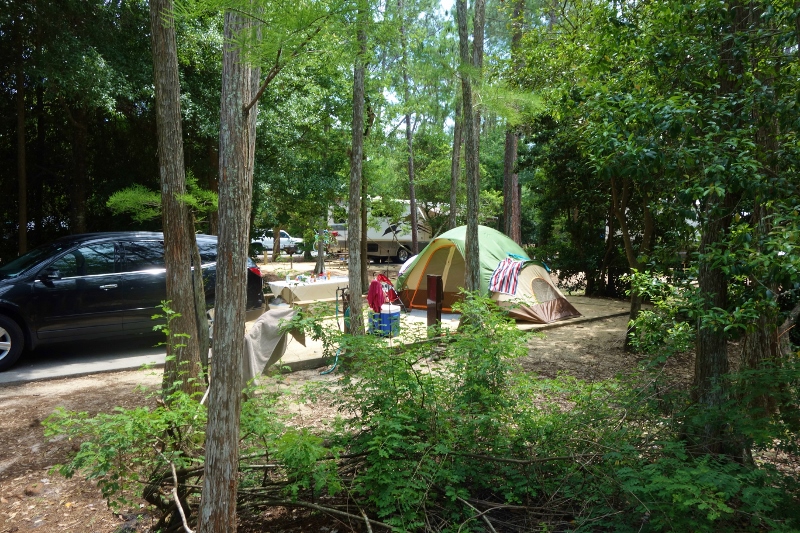
Fort Wilderness’s tent campsites in loops 1500 and 2000 have a driveway big enough to fit a car, golf cart and a pop-up trailer, and a sand tent pad big enough for a couple of tents and a couple of dining flies.
You are allowed to place a car, a golf cart, one camping vehicle or tent, and one additional tent; sites can be booked for as many as ten people. I saw several families sharing a campsite with two tents and hitting the ten person max.
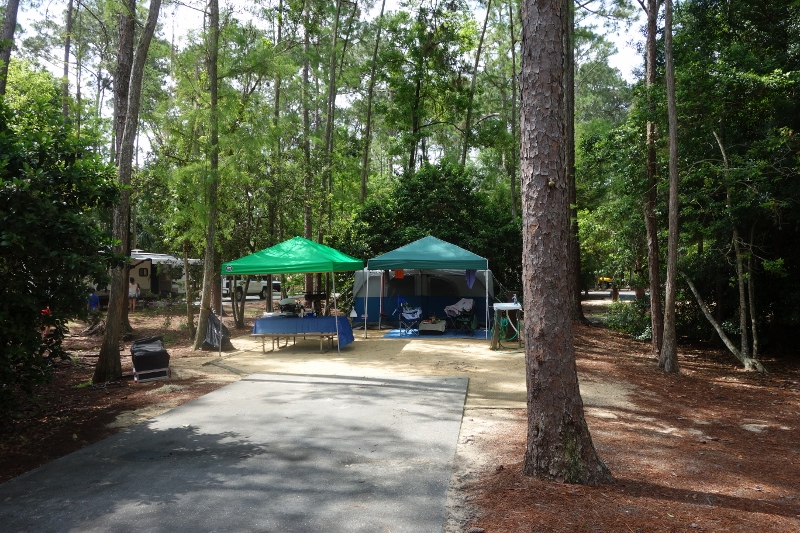
Some more campsite photos from loop 1500:
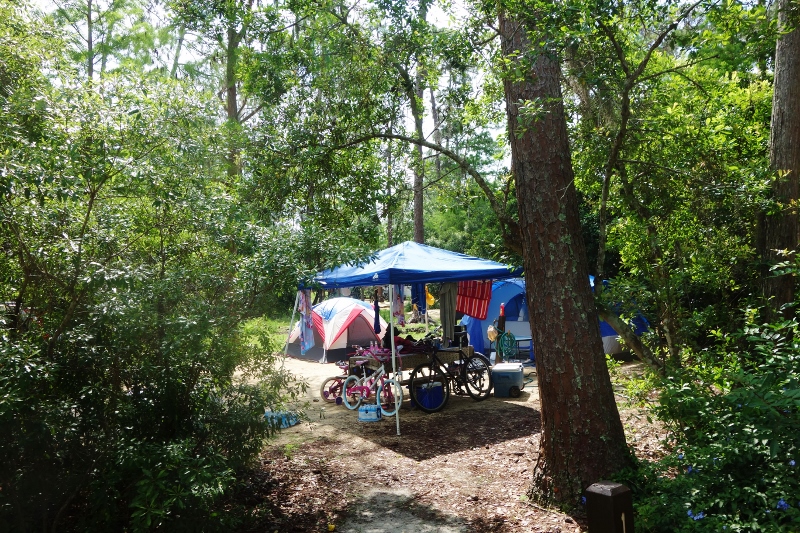
Tent campers need more gear than tents. At minimum they need shelter from the sun and rain, but you’ll see many families with tents and coolers only.
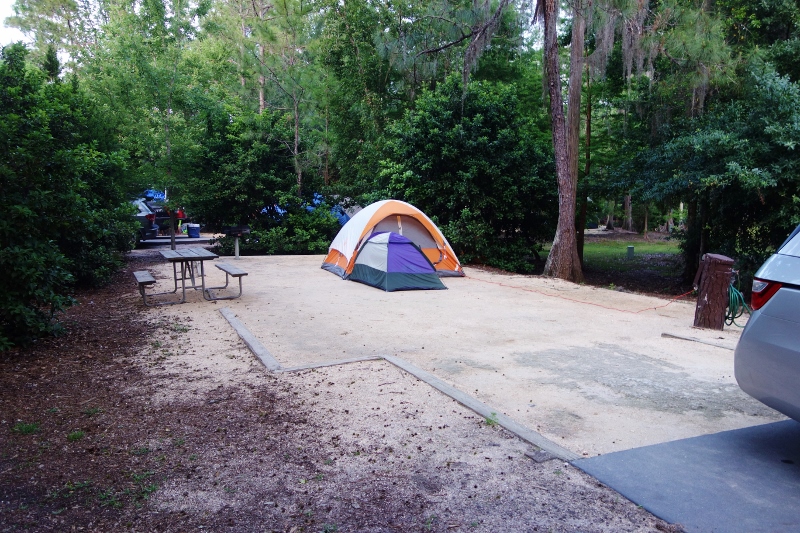
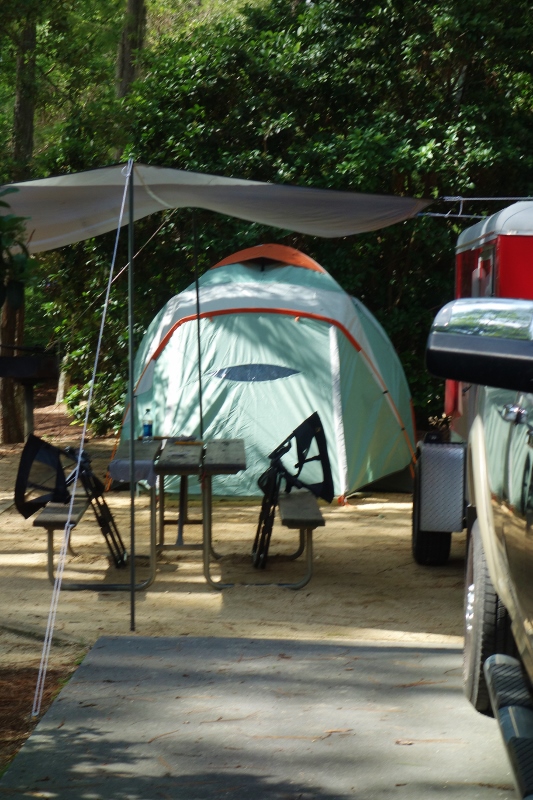
A small family tent, a backpacking tent, and a cooler.
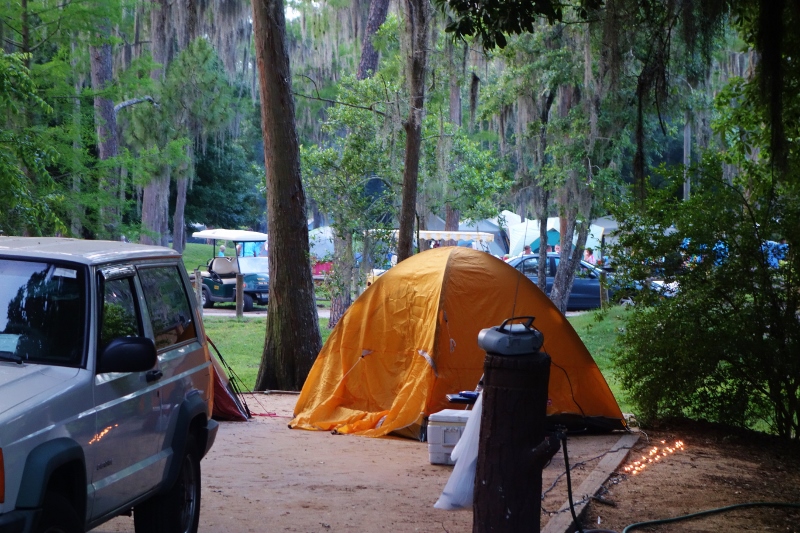
An un-guyed tent, a cooler, and a radio I learned to hate (headphones, people!!).
A tent and a cooler.
So I’m gonna take you through my campsite and gear from my April 2015 visit (my seventh stay at Fort Wilderness, and fourth time tent camping there), as a way to illustrate some key points about what to bring and how to lay everything out.
LAYING OUT YOUR FORT WILDERNESS CAMPSITE
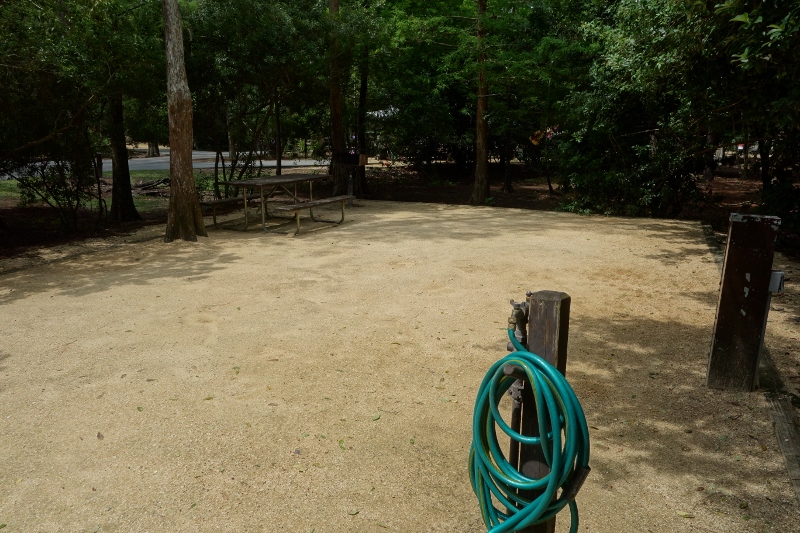
Your campsite will have a driveway, large tent pad, three fixed points–the charcoal grill, the power stand, and the water point–and one movable object, the picnic table.
Most will find plenty of room on the tent pad, but the largest groups–those with, for example, two very large tents and two large flies, one for dining and one for cooking and lounging–can find some space by moving the picnic table and its associated fly to the driveway. (This is often also a good move even with smaller gear sets in the full hook-up sites, as they have smaller tent pads.)
If you have enough room just on the tent pad for everything, the first step is figuring out where to set your tent and where to put the dining area. As you can see in the photos above, most families set their dining area and flies at the front of the space, and their tents at the back. This has the effect of putting the more open and “social” space in the more public loop area of the camping loop, and the more closed and private space away from the loop roadways.
Well, I’d advise the opposite, for the simple reason that the charcoal grill is almost always at the back corner of the site. If you plan to use the grill, place your tent as far away from it as you can, and you’ll have both a simpler “kitchen” set-up and a safer tent. The added plus is that your tent now serves as a bit of a view block, enhancing the coziness of your dining/kitchen/lounge area.
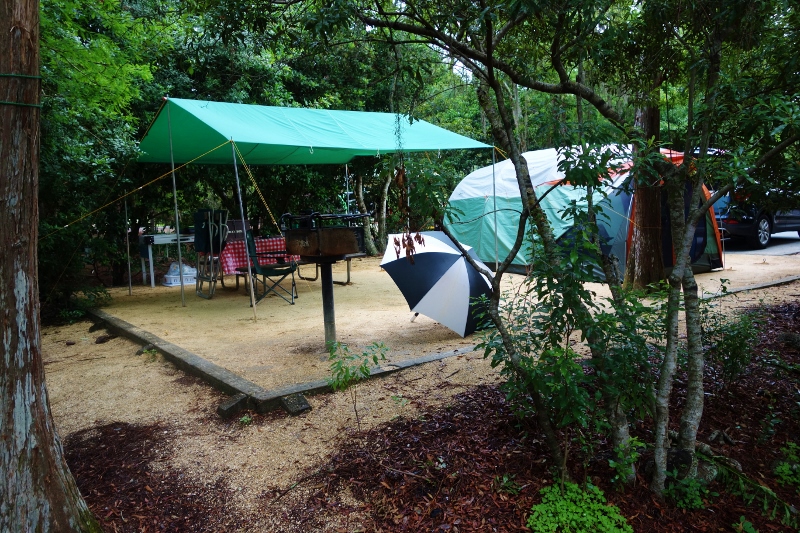
Here’s the layout of my site, taken from the back by the grill. When I took the shot, I hadn’t yet set up our chairs–they went in the space between the grill and the fly:
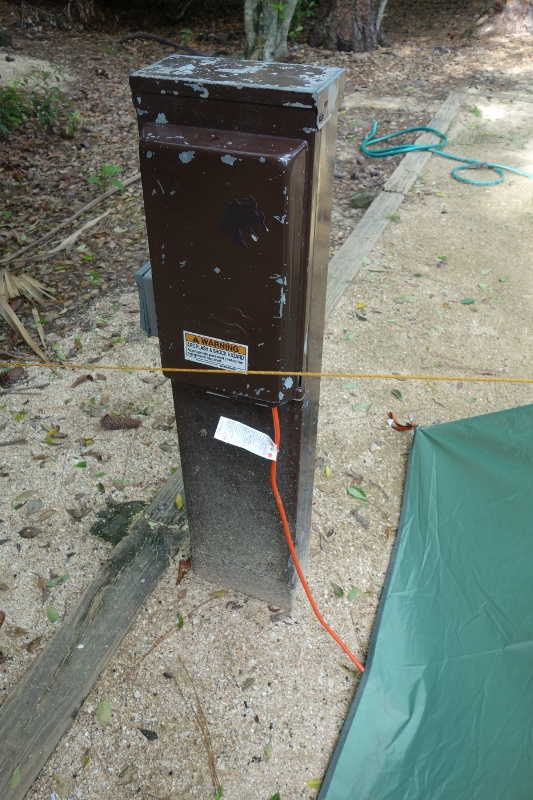
The other layout point to consider is the use of the fixed stuff around your campsite for guy lines.
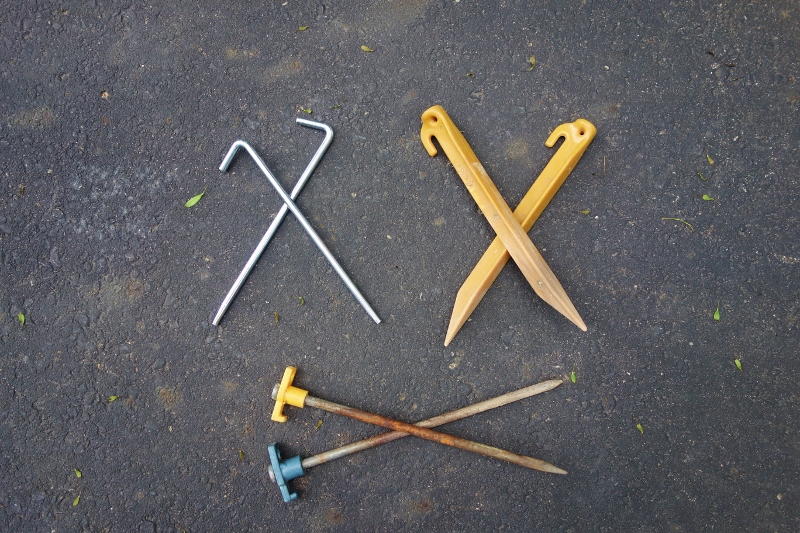
As noted earlier in this review, weather in Florida means you need lots of guys, and standard stakes like those shown above won’t hold up in the sand tent pads in weather.
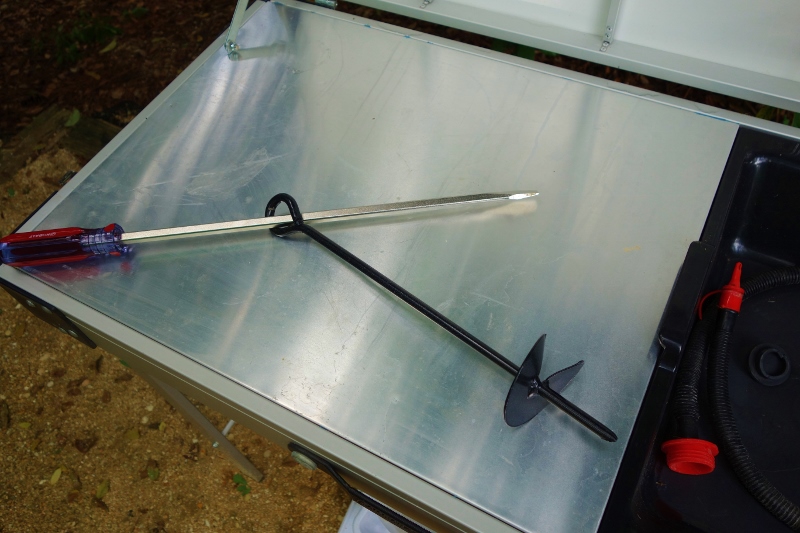
The best staking option for guys is twist-in sand stakes like that shown at the right above (available here; 15 inch screwdriver to use to turn them in not included).
But even better is just fixing your guys to the permanent objects around your campsite–trees, the grill, and the power point. These are much more stable than any stake, and save the effort of drilling in the sand stakes.
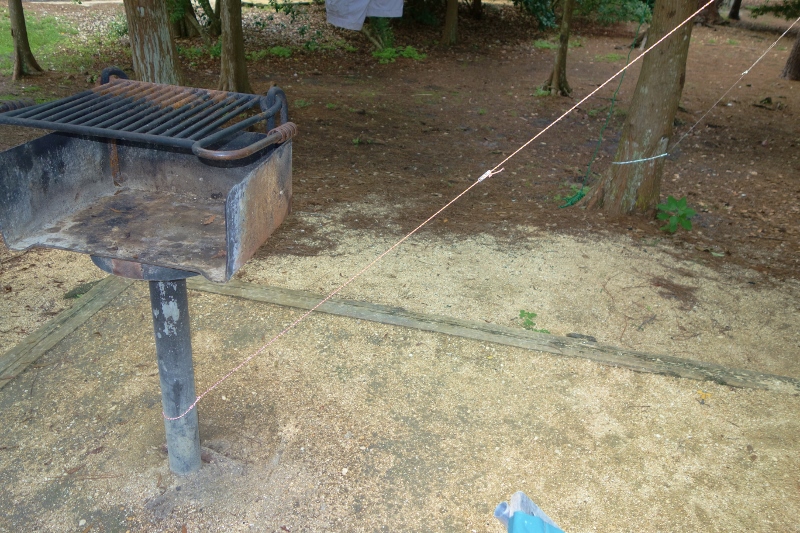
Note how for this corner of my fly I was able to use a tree and the grill for guying, and thus avoided any staking.
Five of my six fly poles (the four corner poles, and one of the two ridge poles) were fixed to something permanent, saving the effort of driving sand stakes.
So as you lay out your gear, look out for ways that by just shifting it a few feet, trees and other permanent features become more and less available for guying.
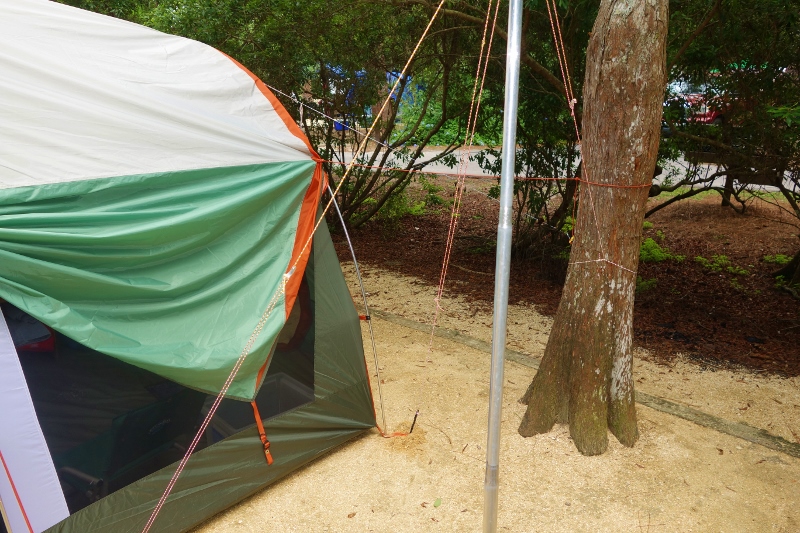
Some trees do double duty. This one is guying both a fly corner and a tent corner.
I travel with 24 top-notch guy lines that I made with Kelty TripTease Lightline![]() with traditional metal line tensioners
with traditional metal line tensioners![]() at one end and bowlines tied at the other end, and another 30 or so older guys with no reflectivity and less useful plastic tensioners for lower-performance uses.
at one end and bowlines tied at the other end, and another 30 or so older guys with no reflectivity and less useful plastic tensioners for lower-performance uses.
If you can comfortably move around your campsite without tripping, then you don’t have enough guys lines out. While check-out time is 11a, if you have the proper number of lines you’ll need to start undoing your guys a day or so before to be ready by then.
COOKING AND EATING AT FORT WILDERNESS
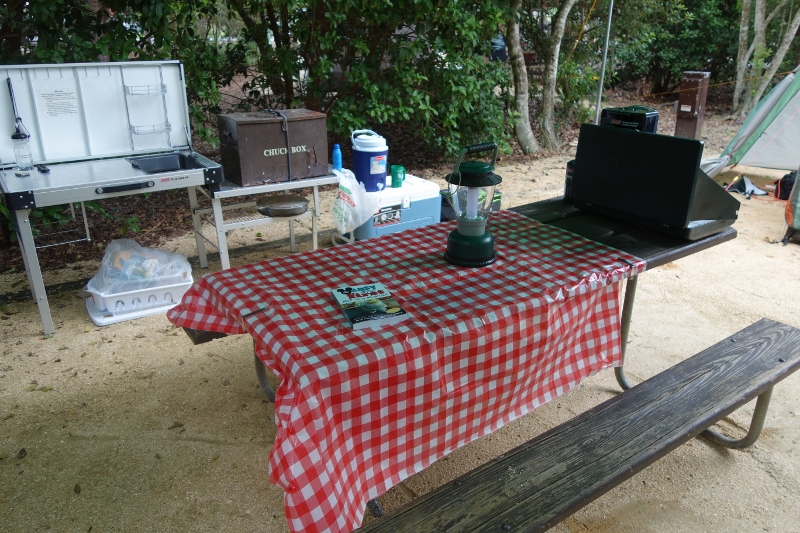
Our kitchen set-up is the standard way we camp when it’s just me and my wife. We use the left side of the long two-level metal table at the back left of the image for food prep and clean up (there’s a sink at the right of this side, and the clean-up gear is on the ground under the table) and the lower right side for our chuck box.
I don’t think this table model is made anymore, but something similar is here![]() . I saw a camper with a table/sink like this that also had a hookup for the water hose you’ll find at all Fort Wilderness campsites! So jealous…
. I saw a camper with a table/sink like this that also had a hookup for the water hose you’ll find at all Fort Wilderness campsites! So jealous…
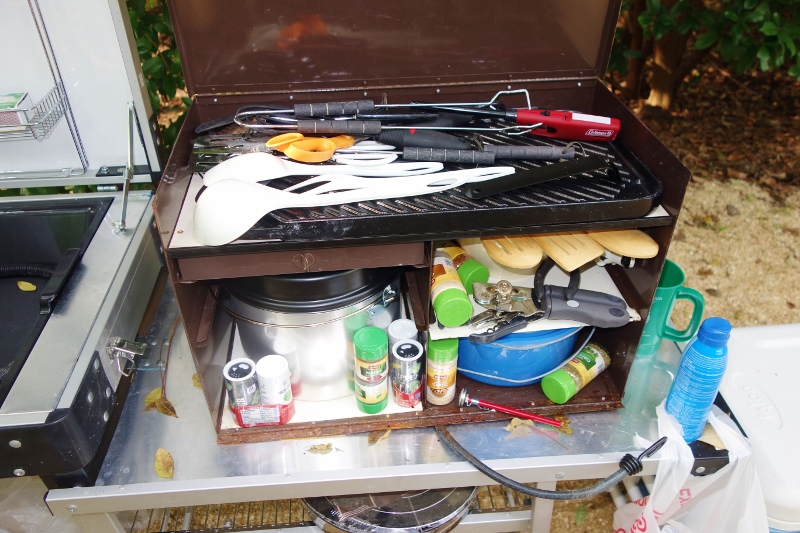
Our chuck box is 15 years old and is so rusted I hold it together with a bungee cord. We’ve outfitted it with everything needed to prep, cook, serve and eat with the exception of wineglasses and big coffee mugs. Most of what’s in it either came with it or is a kitchen cast-off, except I do have good knives in it. It’s always fully packed and ready to go so I don’t need to raid the kitchen or worry about forgetting stuff when we camp.
I can’t find equivalents at a reasonable price–this one![]() is $250 and doesn’t even come with the pots, pans, bowls, cups, and utensils that ours came with–so when ours finally rusts into uselessness my sons and I will build a new one out of marine plywood.
is $250 and doesn’t even come with the pots, pans, bowls, cups, and utensils that ours came with–so when ours finally rusts into uselessness my sons and I will build a new one out of marine plywood.
One the ground at the back right there’s a wheeled 60 quart cooler![]() , a separate small collapsible drink cooler with a grab-through pocket
, a separate small collapsible drink cooler with a grab-through pocket![]() , and a water cooler
, and a water cooler![]() .
.
Hint: fill and ice your water cooler before you start setting up camp. I didn’t, it was 90 degrees with 80% humidity, and if my sister and brother-in-law hadn’t ambled by from their condo for a visit with water bottles, I mighta had heatstroke…
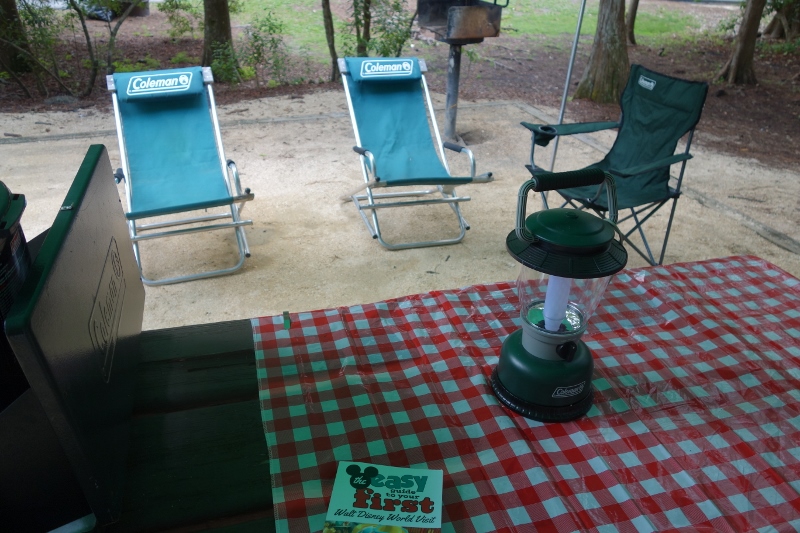
On the table itself there’s a standard two burner stove![]() , a camp coffee maker
, a camp coffee maker![]() , a cute tablecloth
, a cute tablecloth![]() , and a battery powered lantern
, and a battery powered lantern![]() . (Propane, gas, or electric lanterns work fine too.)
. (Propane, gas, or electric lanterns work fine too.)
If the boys had also been on this trip, the second cooler would be larger, and we would have brought another collapsible table and moved the stove to it, so that we’d have more room at the picnic table.
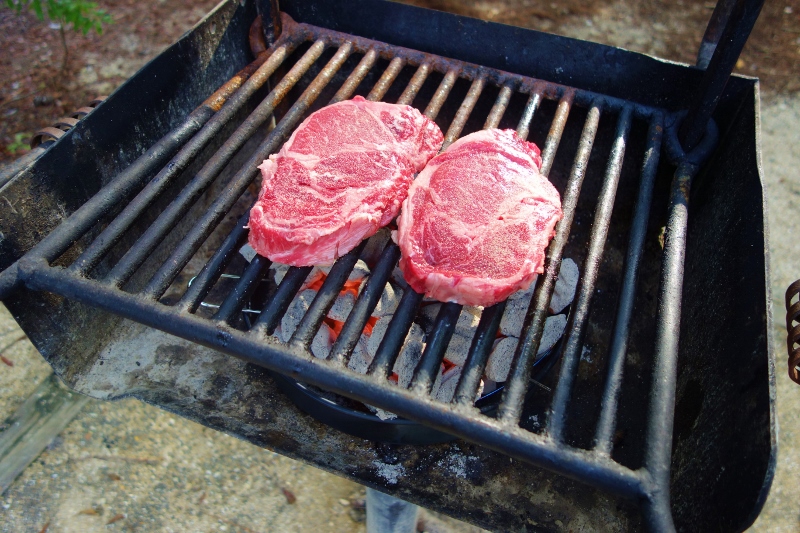
At the back corner of the campsite is the barbecue grill.
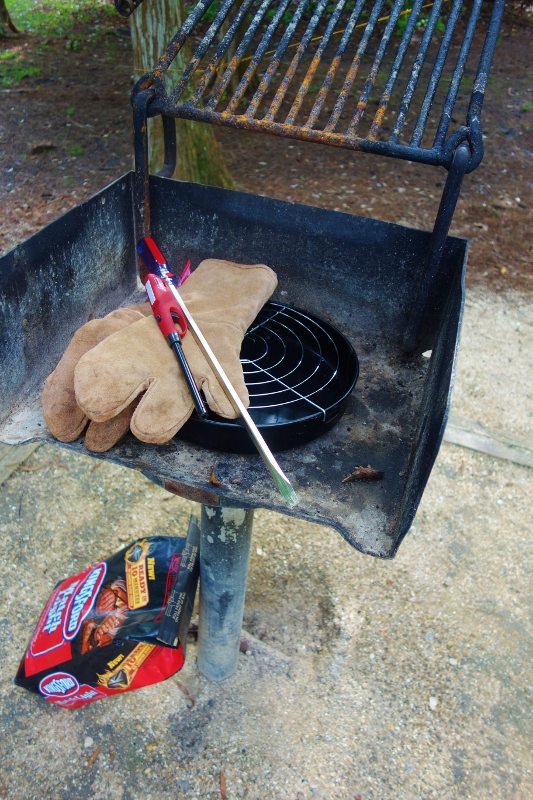
The height of the grill is adjustable above the fire by a friction fit, and the handles are designed to dissipate heat. But I always have fire gloves![]() packed in my gear bag, so I used those instead.
packed in my gear bag, so I used those instead.
I’ve also found that grills of this design don’t have enough airflow, so I usually pour the charcoal onto the top of the grill of a disposable little grill, to get air underneath. I forgot my charcoal chimney![]() , so got match-light charcoal instead of the better-tasting regular charcoal.
, so got match-light charcoal instead of the better-tasting regular charcoal.
I travel with three tarps![]() and tons of poles
and tons of poles![]() , so normally would have had the food prep and dish-washing area covered with another fly, which if I was lucky in my layout would serve as a sun/rain protection rig as well. (The third fly is if I need more weather protection…plus how can having three tarps be wrong??) On this trip it rained so much that we just did prep at the kitchen table.
, so normally would have had the food prep and dish-washing area covered with another fly, which if I was lucky in my layout would serve as a sun/rain protection rig as well. (The third fly is if I need more weather protection…plus how can having three tarps be wrong??) On this trip it rained so much that we just did prep at the kitchen table.
Speaking of rain…let’s talk tents.
TENTS AND SLEEPING AT FOR WILDERNESS
I noted earlier in this review that with storms common at Fort Wilderness, there’s real value to having a high-mesh tent with a full-coverage rainfly.
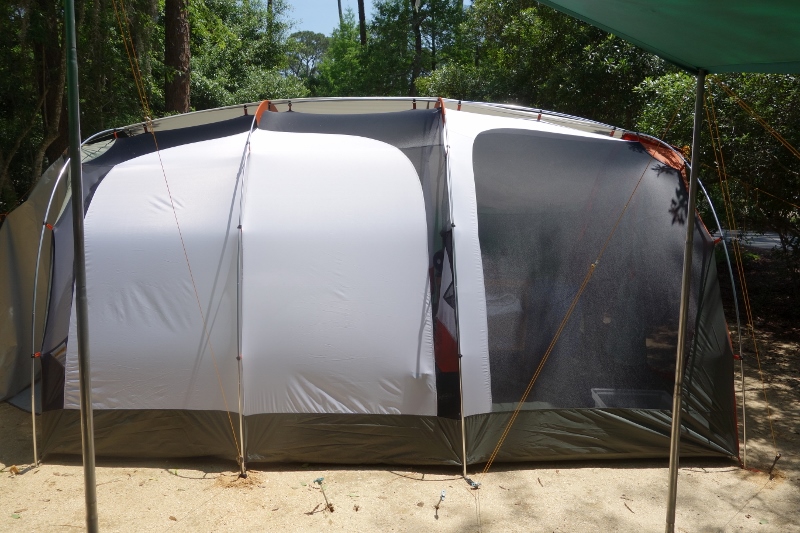
Here’s my tent with its fly rolled up. Note that a third of it is almost all mesh, and the other two thirds have top to bottom mesh on the sides (warm air rises, and is replaced with cooler air from the bottom of the mesh) and full mesh on the top.

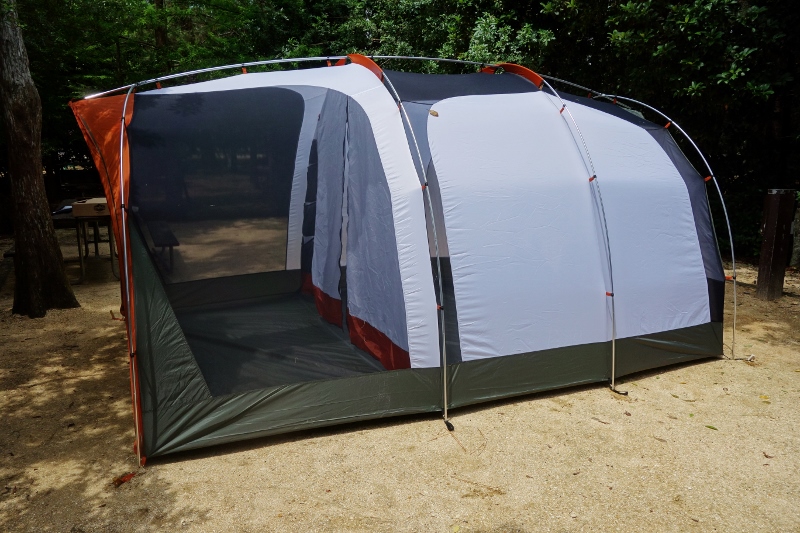
Here it is with the fly, before I guyed it out.
A full coverage fly on a mesh tent is finicky, in that it’s more complicated to roll the fly up during good weather and get it down when you are expecting rain than it is to just zip and unzip the windows you’ll find in a traditional family tent.
But it is much dryer, and much more comfortable to sleep in during rain, than a traditional family camping tent.
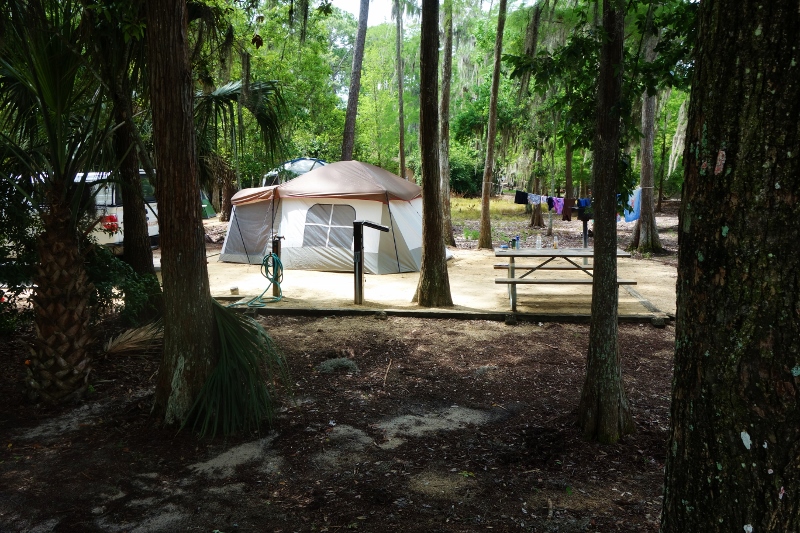
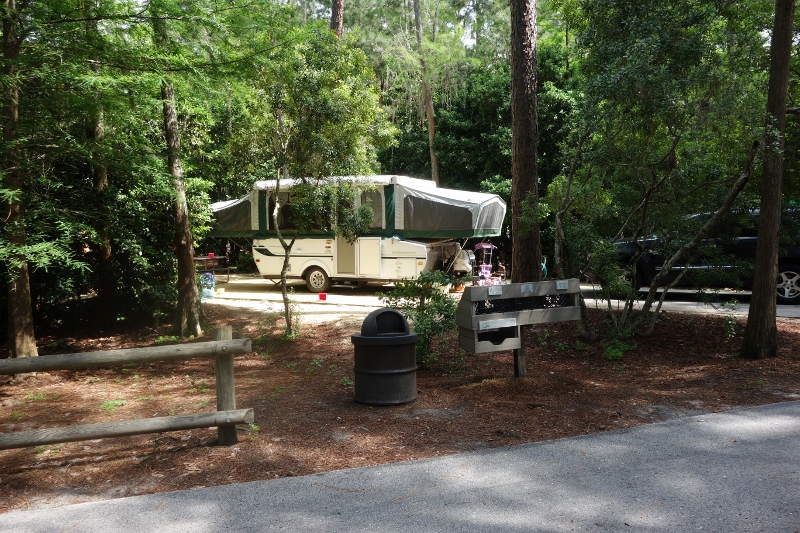
See the traditional tent above. Its rainfly covers only the roof, so is of help only when a light rain is coming straight down. That never happens in Florida, so what you do instead is zip up all the windows.
All those windows, even when zipped, provide a bunch more points for potential rain penetration, and more to the point, zipping them up means you have lost all airflow. So the tent gets warmer and more humid, and more humid and warmer. Water condenses inside and drips on you.
There are better ways to sleep. The simplest and cheapest is to supplement your typical family camping tent with a big blue tarp pitched above it. See the image below:
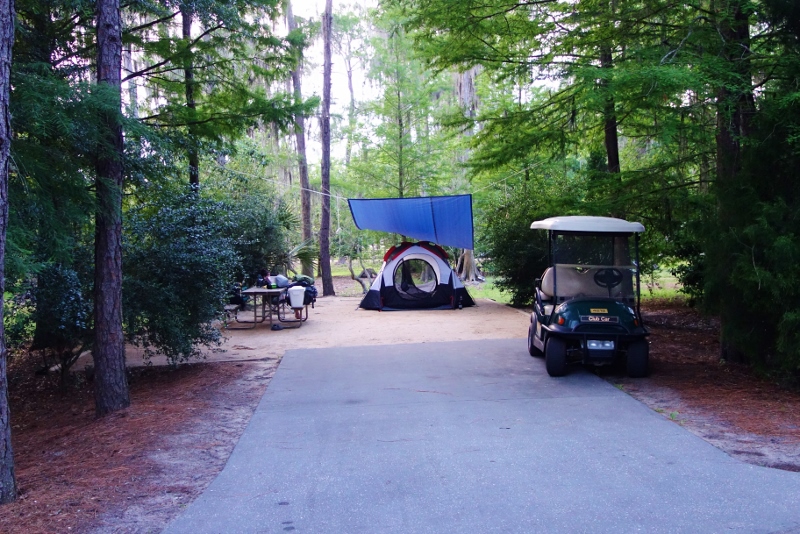
Now this particular blue tarp install isn’t right. The blue tarp needs to be twice as long and twice as wide to provide enough rain shelter that some windows can be open for airflow.
Moreover, it should be pitched with a ridgeline, not as a lean-to, as otherwise water will collect in the middle of the tarp until the lines fail from its weight and all that water is dumped into the tent’s open windows…
Best, though, is a mesh body/full coverage fly tent like mine.
Because every site has electricity at Fort Wilderness, bring some extension cords and both electric and battery powered fans.
Have a fan blowing in at one end, another blowing out at the other end, and hang the battery-powered fan![]() in the peak of the tent to promote hot air exiting, and you can conquer any weather.
in the peak of the tent to promote hot air exiting, and you can conquer any weather.
Sadly, while there’s tons of little tents of this design aimed at backpackers, there’s very few big enough to function as a family tent. Coleman used to have such a model, but I haven’t seen it in a while. The REI Kingdom 8 (my tent) and Kingdom 6 fit the bill, but are very expensive. I got mine as my main Christmas present or we would not have paid so much for a tent. If you have alternatives, note them in the comment form below!!
Another gear point to consider if you have room in your tent is bringing cots. Cots are more comfortable than sleeping on the ground in general, and the added airflow underneath can be cooler.
We happened to have a queen sized cot designed for and sold with an air mattress![]() , so we brought it this trip. We also brought a collapsible shelf unit that my parents got for camping decades ago.
, so we brought it this trip. We also brought a collapsible shelf unit that my parents got for camping decades ago.
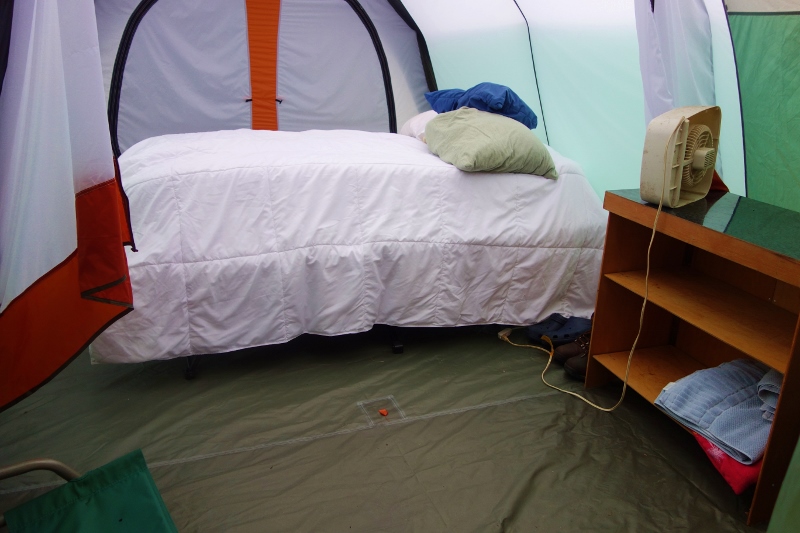
So here’s what the interior of our tent looked like, overall…
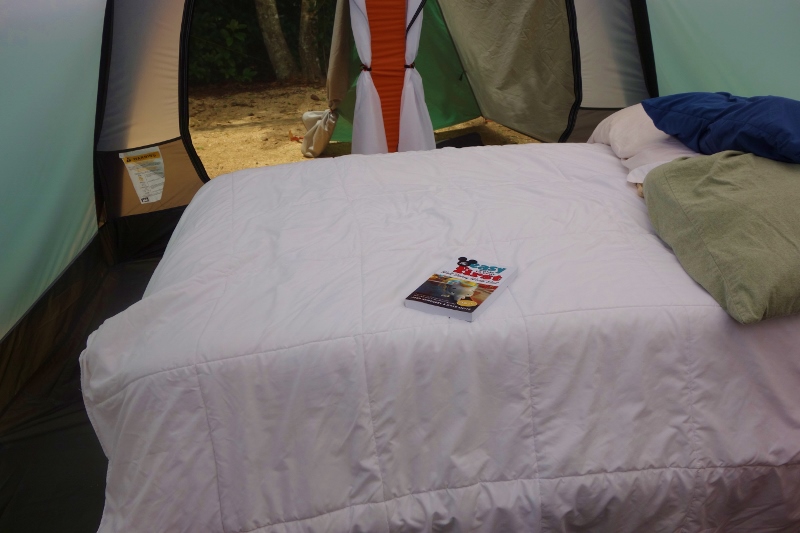
…closer on the bed side…

…and closer on the cabinet side.
We also brought pillows, a comforter, and sheets for the bed.
The point is that while you can sleep on the ground in a sleeping bag, you don’t have to. Take anything that will make you more comfortable that you can fit in your car!
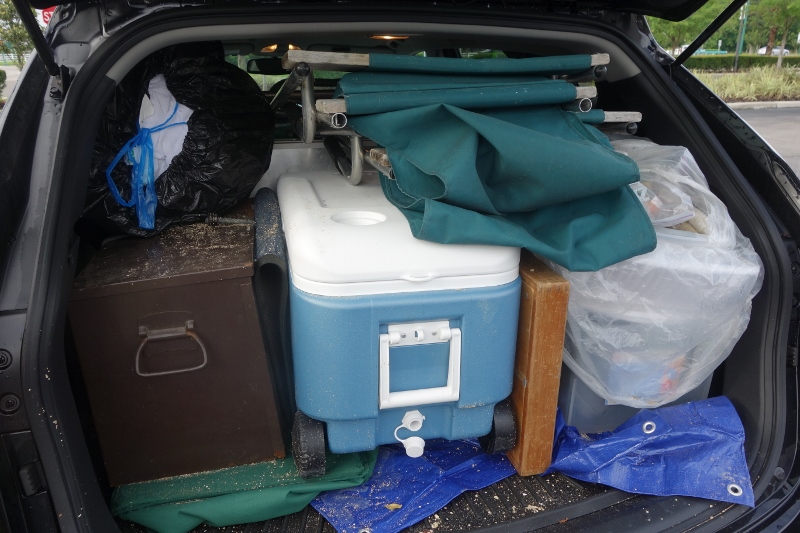
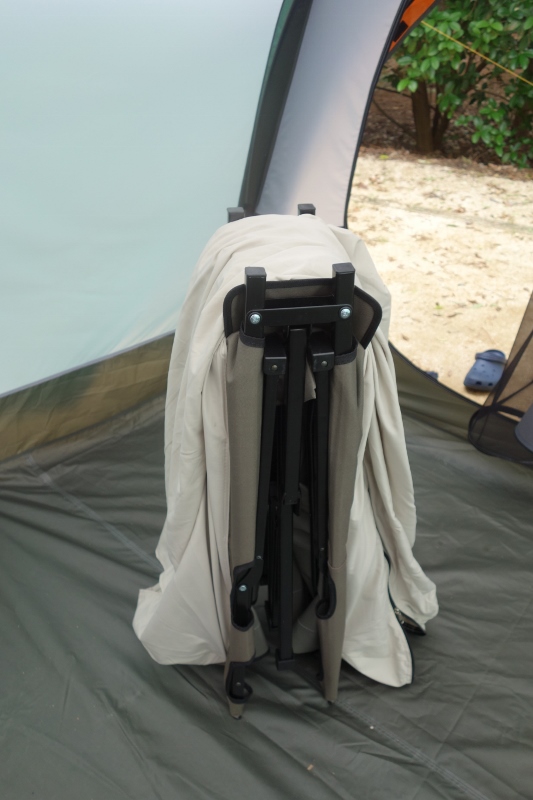
The shelf unit folds up to the tiny wooden thing on the right of the blue and white cooler, and below is how small the cot is when folded up:
THE COMFORT STATIONS AT DISNEY’S FORT WILDERNESS RESORT
This review continues here.
TOPICS COVERED IN THIS REVIEW OF DISNEY’S FORT WILDERNESS
- Overview of Disney’s Fort Wilderness Resort & Campground
- Amenities at Fort Wilderness: The Outpost and The Meadow
- Amenities at Fort Wilderness: The Settlement
- The Pools at Fort Wilderness
OTHER KEY PAGES FOR WHERE TO STAY AT DISNEY WORLD
- Where to stay–the Basics
- Where first-timers should stay
- Reviews of all the Disney World resorts, based on my 150+ stays in them


Follow yourfirstvisit.net on Facebook or Twitter or Pinterest!!


8 comments
Thank you for a very informative article. I just wanted to suggest a low cost family tent that is almost entirely mesh, with a full rain fly-
The Cabela’s Eagle’s Camp Family Voyager 8-Person Tent. Can usually be found for under $150 at the website. We camp in hot and humid Texas, and chose this tent specifically for the mesh/airflow. It does have some drawbacks- cheap zippers- easy to get them stuck- but for the cost we have been happy. Stayed dry in moderate rain, when friends with similar priced top-only-fly were wet- but have not tested it in anything
comparable to Florida’s rains.
Thanks, Rachel!!
Great info. Very organized! I love the collapsible shelf. Where is it from? Thx. ?
Hi Ashley and thanks!! I inherited that shelf system from my parents, and it’s more than 50 years old. I haven’t seen anything like it, but this looks like it has similar functionality: http://amzn.to/2Cbb45T
Thanks for the link!
🙂 Ashley
Great information to have, thanks so much since this will be our first time camping here :)!!
Great Anna!
Leave a Comment | Ask a Question | Note a Problem